Personal ZFS Offsite Backup Solution
zfsbackupsecure bootlinuxtechvpnDigital data has never been as important as it is nowadays. Not only for business, but also for every individual. And it’s challenging to make data safe. For example, we see the news about ransomware that encrypted all the data of big companies, making their business suspended. We also see a lot of extreme weather recently: fires, floods and so on, which threats the hardware that stores the data. So it’s necessary to have backups. There should be at least two kinds of backups to keep data safe: offline backup and offsite backup.
Offline backup means once the data is backed up, it will be isolated from the system. So it can prevent bugs and security risks of the system. How isolated the backup should be depends on the use case and threat model. For personal usage, a removable disk that is disconnected from any machine should be good enough. It’s easy to implement, so we will not focus on it in this article.
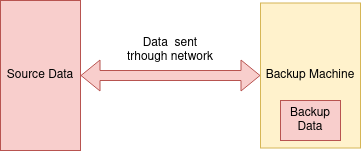
Offsite backup means the backup data is in a different location. So that in the case of natural disaster, fire, flood, hardware theft and so on, you can still recover it from a different location. Again, depending on the threat model, this different location can be a different location in the same city, in a different city, or even in a different country or land. (By the way, I’m always confused when the characters in movies can just destroy a data center, or even a single machine in order to destroy some big plan or very important data. If the people dealing with such important data know nothing about backup, we are in bigger troubles.)
Offline and offsite backup are not mutually exclusive. Some kinds of backup can be both offline and offsite. For example, you can burn all the data onto CDs and mail them away every week. The CDs are both offline and offsite backup. But because of the cost and efficiency, the offsite backup is usually online so it can make backups very frequently and quickly.
In this article, I’ll introduce how to setup a machine used for personal offsite backup. ZFS is needed since it enables incremental encrypted backup. As we can see later, it makes our setup much easier.
1. Goals
Let’s consider what’s the requirements of this setup solution. Data security is obviously the No. 1 requirement: nobody other than ourselves should be able to obtain the data.
User friendliness is another big factor. Most likely we will put this backup machine at a family or friend’s place. So we want it to have very low setup and maintenance effort. Actually, with my setup below, the only thing needed for this machine to operate is to plug in the power and Ethernet cable, then press the power button. No monitor, keyboard, mouse, or NAT port forwarding is needed.
2. Threat Model
Since data security is our No. 1 goal, let’s analyze the threat model in the backup system. First, think about what is trusted and what is untrusted. I divide it into three levels: fully trusted, partially trusted and untrusted.
Fully trusted: the environment is theoretically fully controlled by ourselves and no one else can see the data in it. I know it’s hard to be 100% safe for an environment, but how to achieve that is totally another topic. Let’s assume in this setup, the machine that holds the source data can be seen as fully trusted.
Partially trusted: we can trust the environment on some level but it’s still possible to be unsafe. For example, for the machine located at a different location, which can be physically accessed by other people, it’s not fully trusted. Though we can usually have high trust level for the people that manages the place, which is usually our family or friend, it’s still possible that the data on the machine can be obtained.
Not trusted: the parts that cannot be trusted at all. Anyone with some security background can obtain data from this part. For example, the public network is not trusted.
Here is a diagram about the trust levels in our system: fully trusted part is in green, partially trusted is in yellow and not trusted is in red.

Then let’s also analyze the parts of the system we want to keep secure. In the diagram bellow, the red part means we want 100% security. Yellow part means we want it as secure as possible, but it’s also okay if it’s not 100% secure.
So with these two graphs combined, we identified some parts we need to consider:
- Network and backup data. These parts are either not trusted or partially trusted, but we want full security for the data that goes through there. So we need full encryption on these components. Luckily it’s easy to do with ZFS: ZFS can send encrypted snapshots and receive it on another machine without ever decrypt it.
- Backup machine. It’s under partially trusted environment. We shouldn’t put any sensitive data into its system. If it’s compromised, the backup data can still be safe: no one can see the content of the backup data, but the backup process may no longer work as expected.
With this in mind, let’s start to setup our backup machine.
3. Backup Machine Setup
3.1 Choose the Hardware
Since we need to have ZFS on this machine, we’d better choose an x86 machine instead of an ARM one. I know ZFS has ARM builds but I’ve never tried that, and don’t know how good it is. Data safety is very important so I’d rather use a tested solution.
The machine doesn’t need to be too powerful but larger than 4G memory is recommended because of ZFS. It should be able to handle two disks since it makes data recovery easier as we can see later. Considering we will place this machine at someone else’s home, it’s better to have a small form factor.
It’s better to have TPM as well. Otherwise we cannot setup disk encryption (other than our backup data) in a user friendly way, which means anyone with physical access to the machine can get access of system data (which is also okay since we don’t have sensitive data on system). Old machines usually has TPM 1.2 chip, which is not as secure as TPM 2.0. But it’s good enough considering our use case and the cost.
There are a lot of cheap choices for used machines like this. Like ThinkCentre tiny desktops, or HP EliteDesktop. The Youtube channel ETA Prime has a lot of reviews for such machines. A potential risk of buying used hardware is it may contain security backdoors, but it’s very rare if you are not targeted and you buy it from sellers with good reputation. Even if it happens, as we’ve analyzed above, the backup machine is not treated as a fully trusted environment, so it’s fine.
3.2 Secure BIOS
The first thing we need to do is securing the BIOS, so no one else can change any configurations. If we don’t protect it, anything we do in the later steps is meaningless.
How to secure the BIOS depends on the manufacturer. Most likely there will be a “security” section in the BIOS, which has “password protection” option. So that you can protect the BIOS with a password.
Keep in mind most of the machines can reset BIOS with some hardware button or wire, thus reset the password as well. But it will also reset the TPM, which means it doesn’t expose the encryption key of our system disk, which we will setup in the next step.
3.3 Setup System Disk Encryption with TPM
I choose Arch Linux as the operating system for the backup machine. I know it’s controversial as Arch Linux is not considered as the most stable Linux distribution. But this is a personal setup and I’m using Arch Linux for all my own machines. I’m very familiar with it. It’s very stable in my experience, and I can keep the ZFS versions the same. So I’ll mainly focus on the setup for Arch Linux from here, but any main stream Linux distribution should be able to do these setups with minimal adjustment.
The first thing we want to do is to have disk encryption for the system. (We use another disk for ZFS and it’s already encrypted, so we don’t need worry about that one.) While installing the OS, you can choose to encrypt the disks and use either a password or a key file stored at another place like a USB drive. In this way, you can input the password or plugin the key file during boot. But it needs human interactive, and we don’t want other people to have the password or key in order to boot the machine. So we will set up another key that stores in TPM and can be decrypted automatically during startup.
It’s very easy to set up disk encryption with TPM 2.0. Systemd has very good support for that. The steps are in the Arch wiki. I’ve never tried this since my backup machine only has TPM 1.2 chip, but the steps looks very straightforward.
With TPM 1.2, it’s much harder and took me a lot of time to figure it out. At last I found a repo on GitHub and forked it with some modifications in order to support busybox initramfs, which is the default setup for Arch Linux. Here is my updated repo. It’s not easy but I believe the security it adds worth the effort.
3.4 Setup Secure Boot
The disk encryption above doesn’t include boot loader. In order to make the boot loader safe, we can setup secure boot, which will prevent the system from booting if the boot loader is not signed by a trusted party. There is an Arch wiki described the steps as well. I used the option of “Using your own keys” and use sbupdate to automatically sign new kernels after update. Make sure to add kernel parameters, especially the parameters related to disk encryption into CMDLINE_DEFAULT in /etc/sbupdate.conf as mentioned in the sbupdate document.
3.5 Setup VPN and SSH
In order to make ZFS remote backup work, we need to establish a SSH connection between the source machine which holds the data we want to backup, and the backup machine. Obviously it’s not safe to let the source machine act as the SSH server, since the backup machine is not fully trusted. But we cannot make the backup machine as a SSH server on public network either, since it needs port forwarding setup if it’s placed in a home network, which is very user unfriendly. So we need a VPN network to let the backup machine connect as a client, then it can act as a SSH server in the VPN network.
There are many VPN solutions out there. OpenVPN is the most popular one with lots of features. But WireGuard is newer, more efficient and easier to setup. So I choose WireGuard as my VPN solution. I setup the VPN server on my source machine and use NAT port forwarding to make it accessible from public network, so the backup machine is able to connect as a client. The setup guide can also be found in an Arch Wiki, with some additional notes:
- Use DNS name for the source machine address, so that in the case of IP changes, the backup machine can still connect to the VPN automatically.
- Add
PersistentKeepalive = 1in the client configuration, so that the client will send a package every 1 second to keep the connection alive. - Enable the VPN and SSH service so that the backup machine will be able to connect after reboot.
- Setup the firewall properly, since the backup machine is not trusted.
3.6 Install ZFS
Finally we can install ZFS on the backup machine so it can receive ZFS datasets. Since we don’t need ZFS on the root filesystem, it’s very easy to do. Just follow the Arch Wiki for ZFS. I also wrote a blog post about it but I don’t think it’s needed for this simple setup.
3.7 Conclusion
After all the setup, let’s look at what we have achieved for this backup machine.
From the security point of view, we make it reasonable secure: the disk is encrypted and the encryption key is stored in TPM securely. The boot loader is also prevented from modification because of secure boot. It’s not 100% secure though, for example, when the machine is powered on there are ways to freeze the memory and read the disk encryption key from it; TPM 1.2 has security risks as well. But even though there are some security risks, it’s very hard for average people to actually compromise the system. And as I’ve mentioned multiple times above, the security risks don’t affect the security of our backup data since the transfer and storage are all encrypted without ever exposed the encryption key.
From user friendly point of view, as I mentioned at the starting, the machine can be put anywhere that has a good network connection. And with just power and Ethernet cable plugged in, it would be ready to operate.
4. ZFS Send and Recv
After the backup machine setup, we can finally backup the ZFS datasets to it. It’s very easy for ZFS to do remote backup, just make sure to use the flag -w when send so it will send the encrypted ZFS dataset (given the source dataset is already encrypted). For example:
zfs send -R -v -w zroot/root@snapshot-name | ssh <backup-machine-ip-in-vpn> sudo zfs recv -Fu zoffsite-backup/root
It’s also easy to send incremental back using command like this:
zfs send -R -v -w -i zroot/root@from-snapshot zroot/root@to-snapshot | ssh <backup-machine-ip-in-vpn> sudo zfs recv -Fu zoffsite-backup/root
In my case, I don’t want to backup all the datasets since I can download some of them like Steam games from somewhere else. So I wrote a script to get all the datasets I want to backup and send them one by one without using the -R flag. Anyway, with the power of ZFS you can basically backup in whatever way you want. You can put the script in a cronjob or systemd timer to run it every day for instance.
At last, there is an important note about data recovery. If you ever need to recover the data, make sure not to mount it in the backup system directly since the backup system is not trusted. Instead, get the physical backup disk, mount it on a trusted system, and recover from there.