Remove Microphone from MOVA P10 Pro Ultra Gen 2
privacycleaning robotvoice assistantRecently I’ve bought a cleaning robot, MOVA P10 Pro Ultra Gen 2. At first, I wanted to buy a cleaning robot that supports Valetudo, an open source firmware, so that there is less privacy concern. But it doesn’t really support multi floor mapping. And MOVA P10 Pro Ultra Gen 2 doesn’t come with a camera, only with laser and LiDAR navigation. I think it’s acceptable trade off to let it know the floor map for the convenience, so I bought this one that is not supported by Valetudo yet.
However, after I got it, I found it has a microphone, which theoretically can listen to the conversations all the time. That is something I definitely cannot accept. So I tried to remove the audio input. At first by covering the microphone holes, but without success. So it has to be done physically, by removing the microphone. There is no resource online yet about how to do that, since this is a relatively new model. So I figured it out myself and thought it would be helpful to share here: it is really simple once you know how to do it.
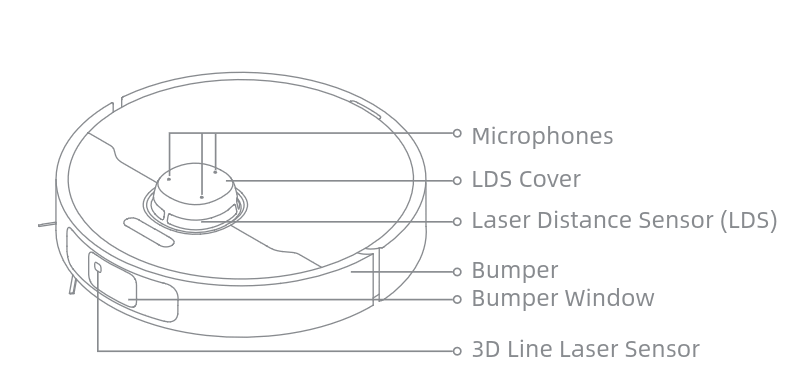
First, as shown in the user manual, here is where the microphone is (it’s inside the LDS cover):
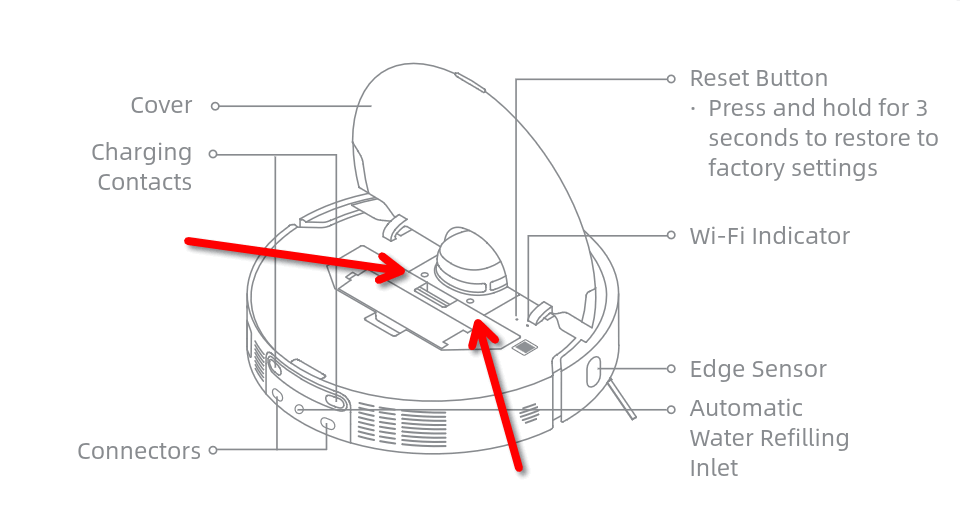
The LDS cover is fixed to the body with 4 screws. The first 2 screws are under the lid that flips open:
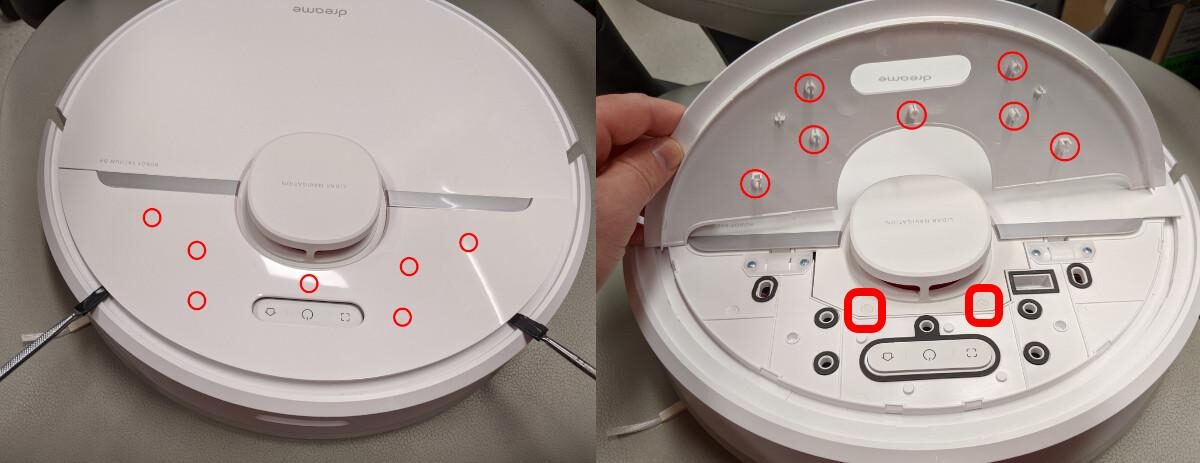
The other 2 screws are hidden under the other piece of the top cover. Pry it off with a pry tool or your fingers, and you will see the other 2 screws, marked by the squared circles in the photo below (ignore the other circles, they are from Valetudo’s guide):
Once all 4 screws are out, twist the LDS cover a little to lift it off, so you can get to its bottom. The bottom has another 4 screws and a cable connected into it. We need to open it to get to that cable:
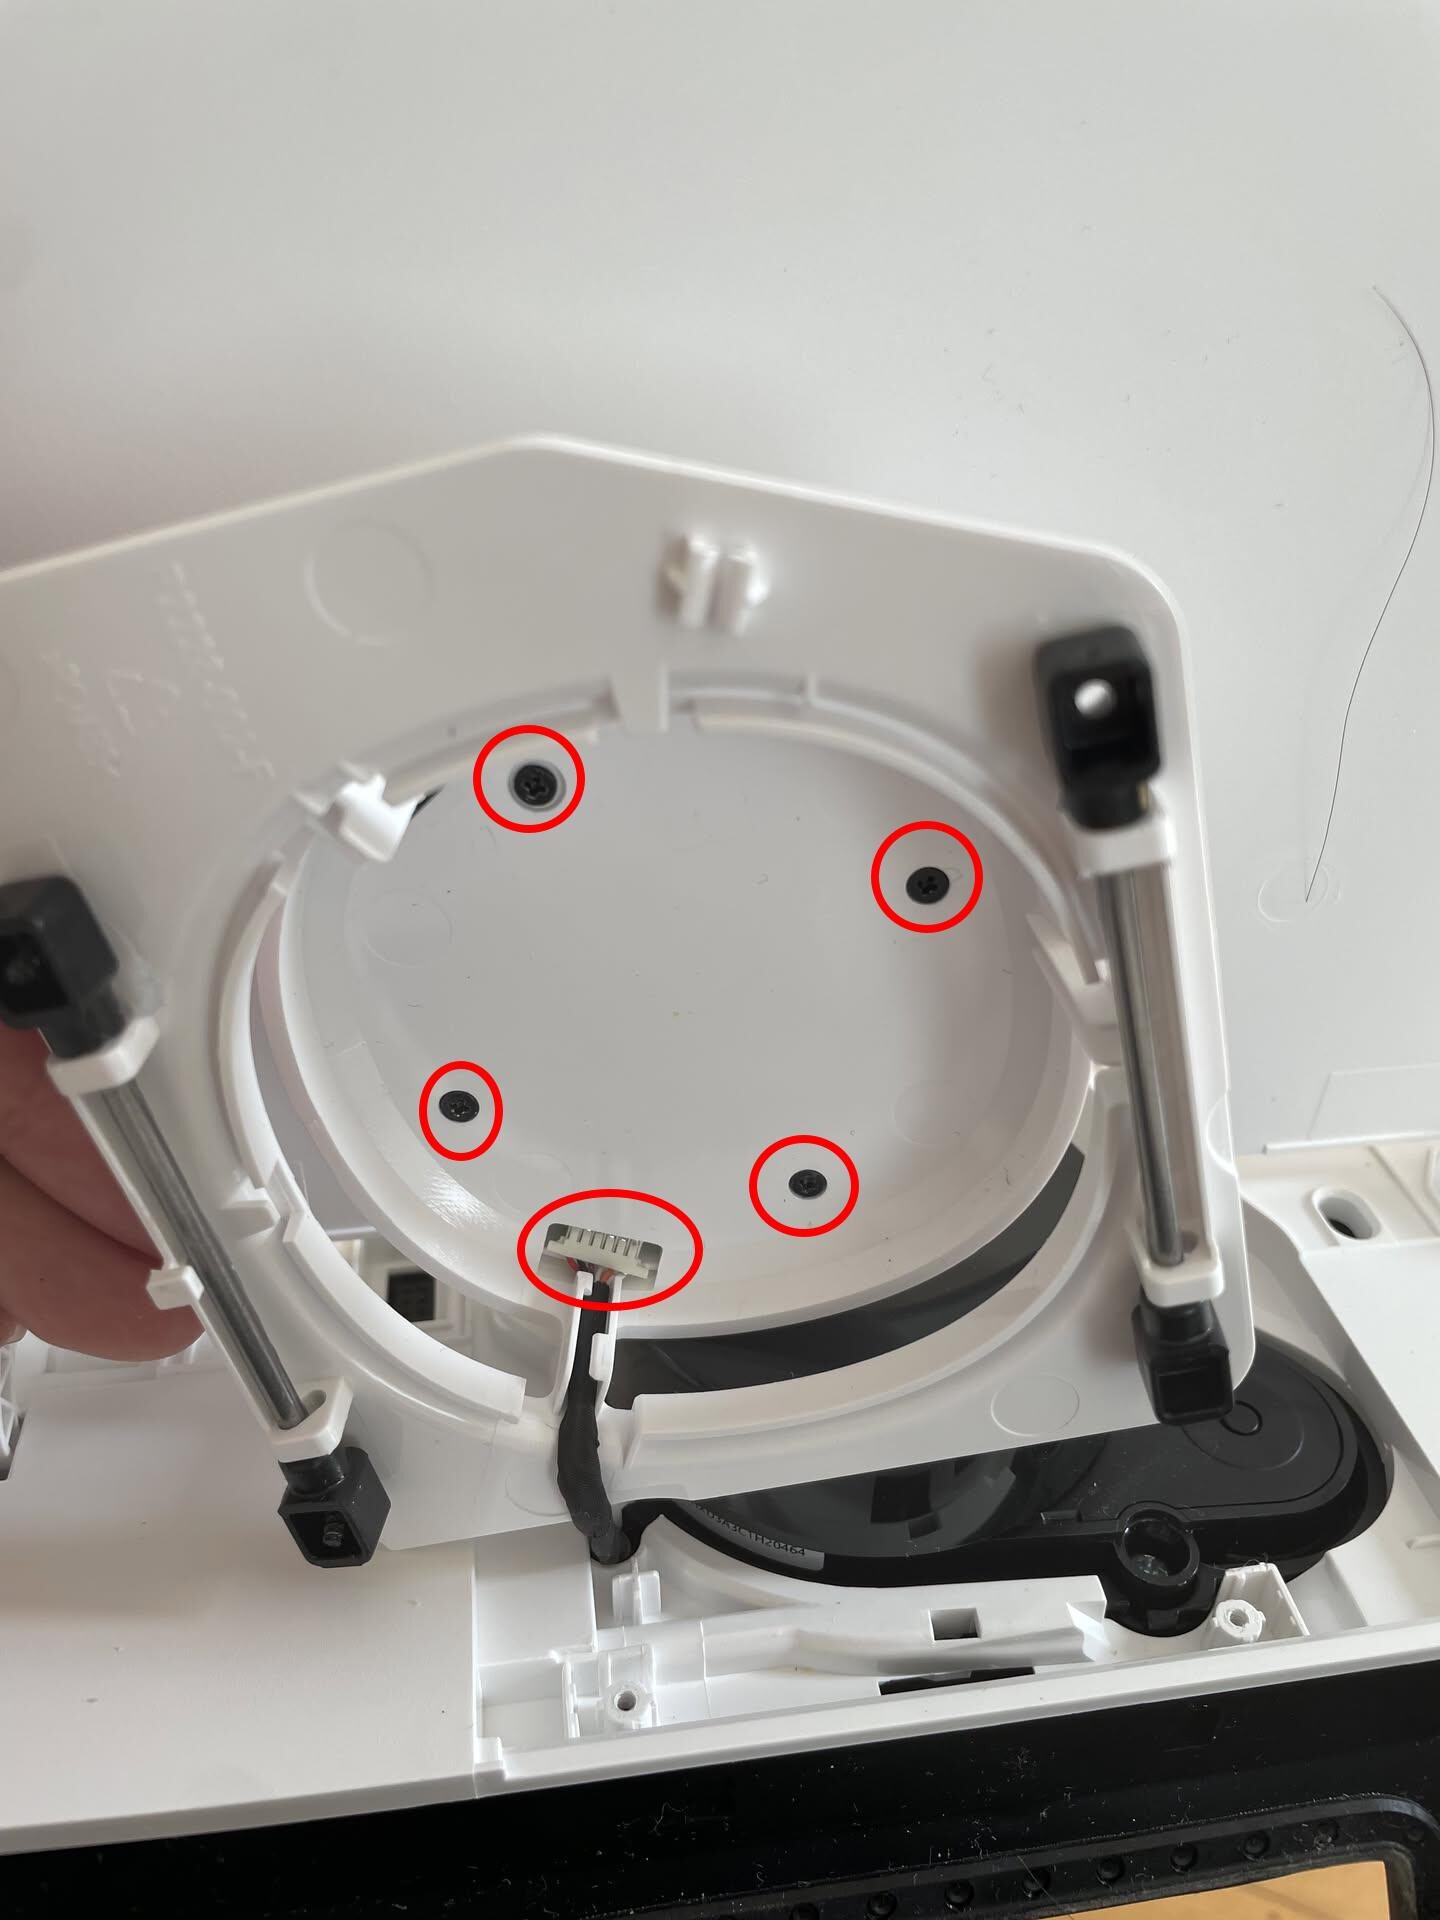
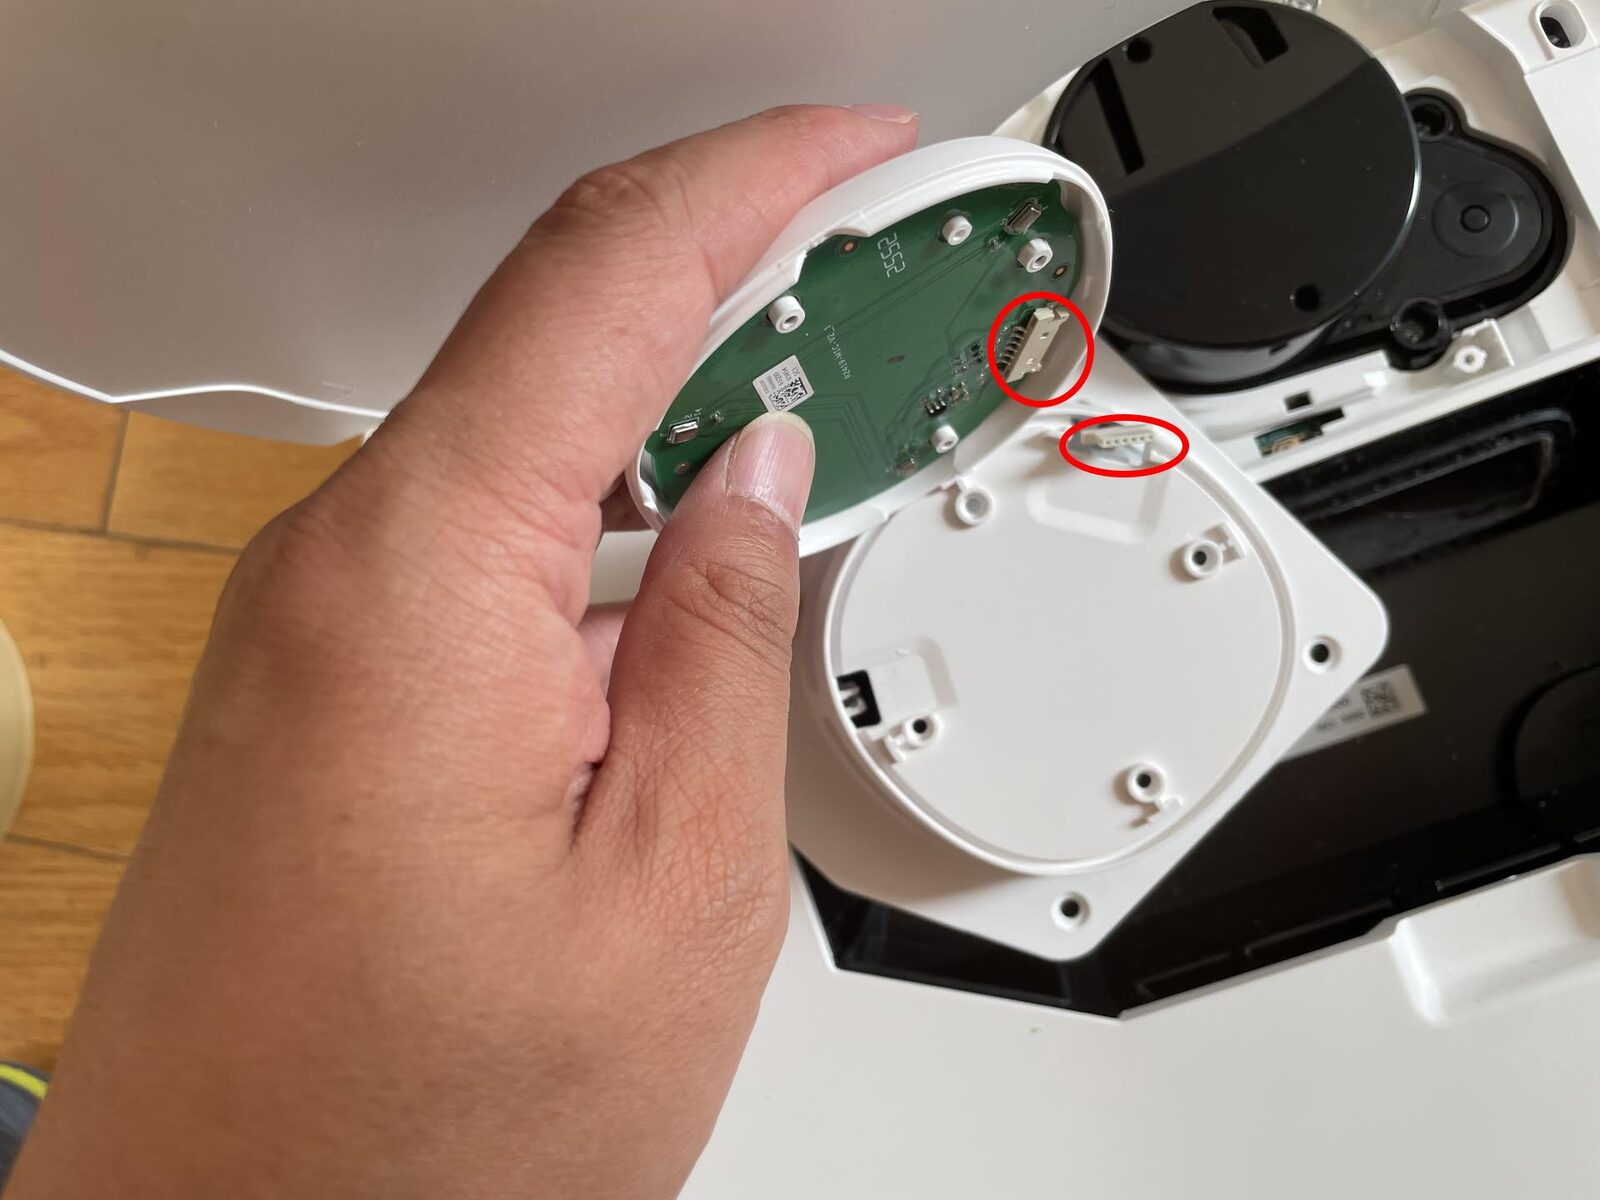
Once you unscrew those 4 screws, you can open the LDS cover and the microphone PCB is there. Disconnect the microphone PCB’s cable and it is all done: